Property manager guides
Settings: workspace, team, billing and rules
Set up your company details, invite your team, choose and pay for a plan, and set the rules for the Agent, notifications and portals.
- Updated
- Reading time
- 2 min read
On this page
Settings (bottom of the sidebar) has eight tabs: Workspace, Team & Roles, Billing, Integrations, Developers, Rules & Access, Security & Data and My account. Most need an owner or admin.
Workspace details
The Workspace tab has sections for General (name, legal company name, company number, VAT number, support email and phone, registered address), Branding, Locale & Region, Portfolio Defaults, Communications (signature, quiet hours, email sender and shared mailbox), Compliance & Custom requirements, Licences & registrations and Import & Export. Choose Save changes after editing.
Invite your team
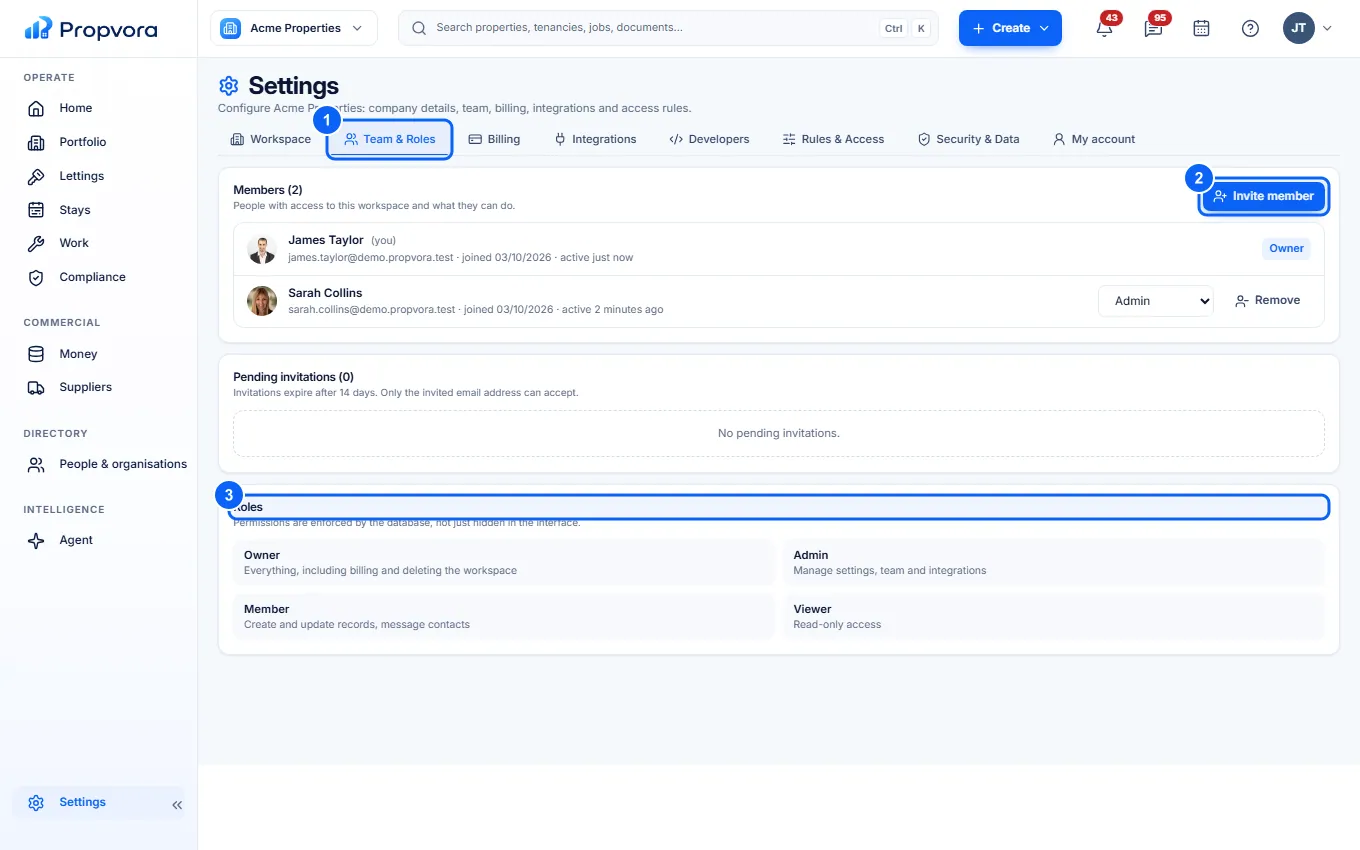 (opens the full-size screenshot)
- Open Team & Roles.
- Choose Invite member, enter their email address and choose a role. They receive an email invitation.
- Roles explains what each role can do. See Workspace roles.
Your plan includes a number of team seats. Pending invitations are listed until they are accepted.
Choose or change your plan
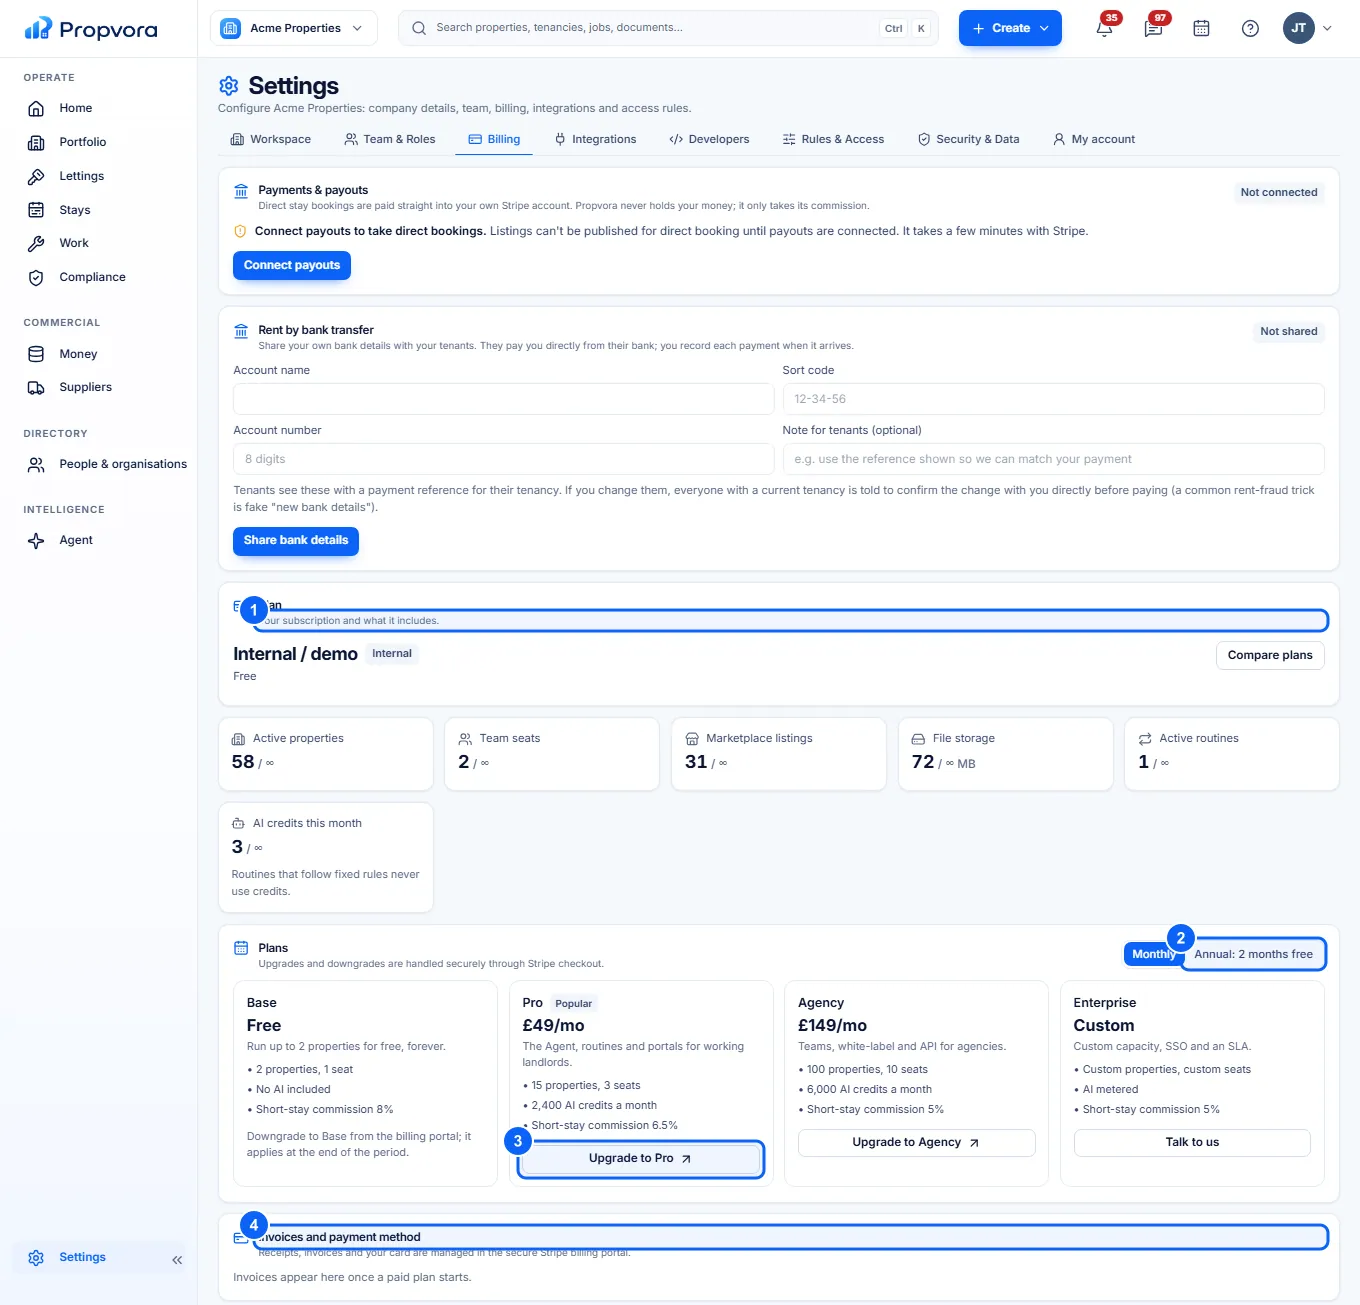 (opens the full-size screenshot)
- Open Billing. Plan shows your current plan, trial end date and usage against your allowances.
- Choose Monthly or Annual: 2 months free.
- Choose Upgrade to a plan. You pay securely through Stripe; the estimated proration is shown first.
- Invoices and payment method: choose Manage billing to open the Stripe billing portal for invoices, your card, and cancelling.
Billing also has Payments & payouts (connect a Stripe account to receive stay and marketplace payouts), Rent by bank transfer, Listing slots and Boosts & ads. See Change or cancel your plan.
Rules & Access
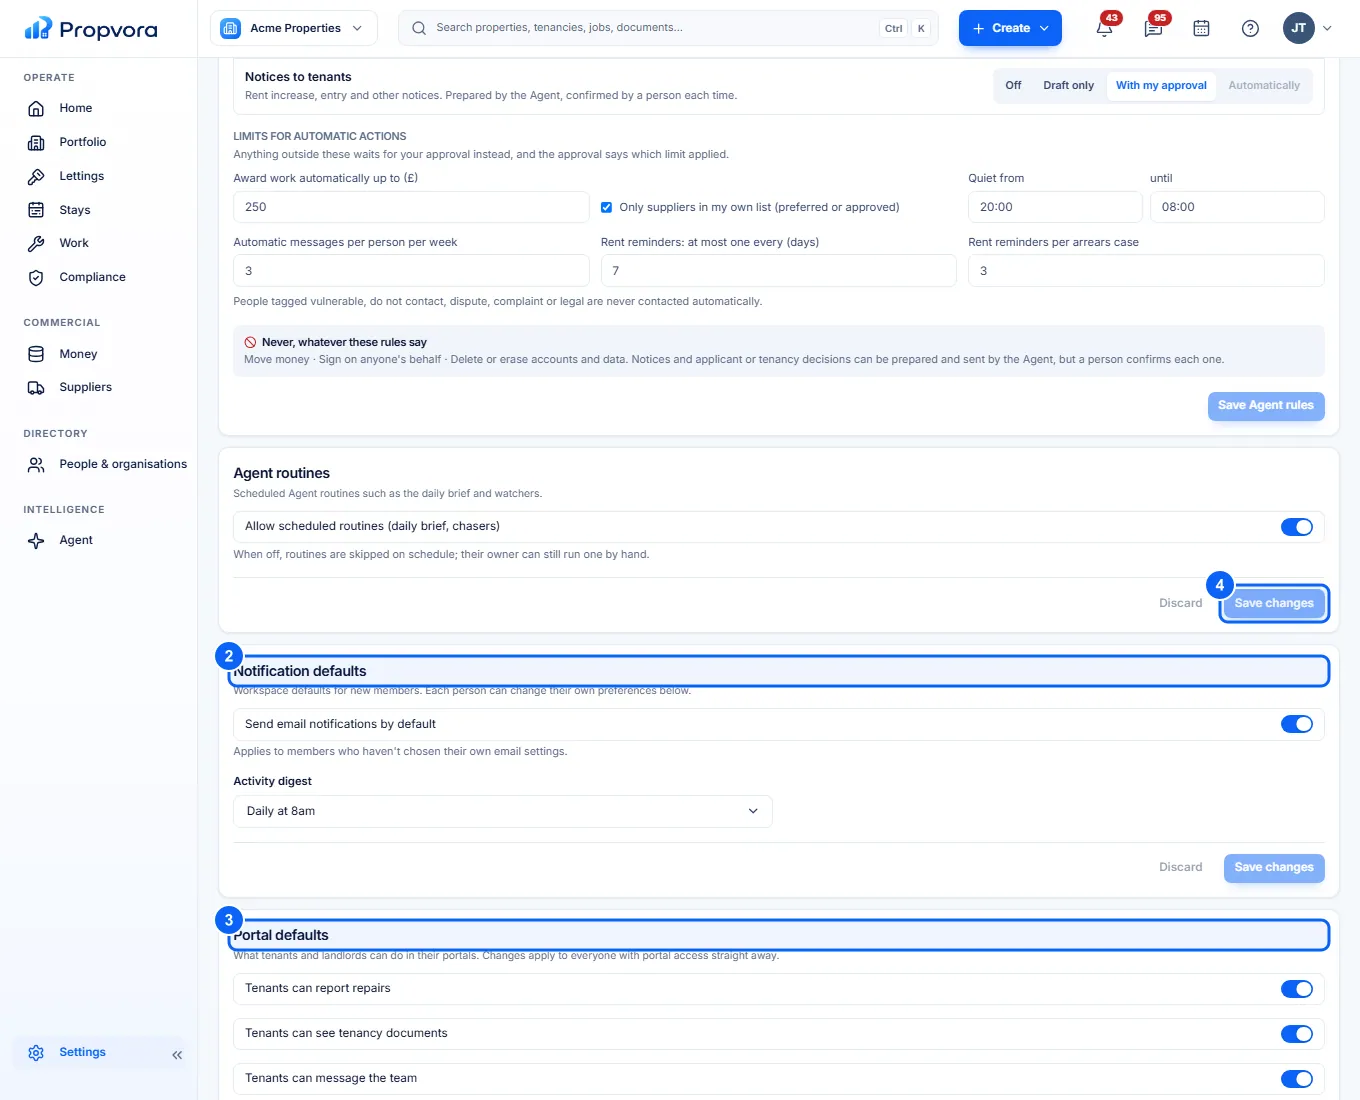 (opens the full-size screenshot)
- Open Rules & Access. The Agent rules card at the top controls what the Agent may do on its own (see Use the Agent).
- Notification defaults: whether members get email notifications by default (Send email notifications by default) and how often the Activity digest is sent.
- Portal defaults: what tenants and landlords can do in their portals, and how long invitations last.
- Choose Save changes.
Security & Data lists your sessions (Sign out others), the audit log and Data export. My account holds your profile, identity verification, password and two-factor authentication.