Property manager guides
Tenancy paperwork: agreement, e-sign, guarantors and inventory
Send the tenancy agreement and guarantor agreements for e-signature, create check-in and check-out inventory reports and share documents securely.
- Updated
- Reading time
- 2 min read
On this page
Every tenancy has a Documents tab for its paperwork. You can send documents for electronic signature (each signer gets their own secure link), add guarantors, record inventories and keep every file in one place.
The Documents tab
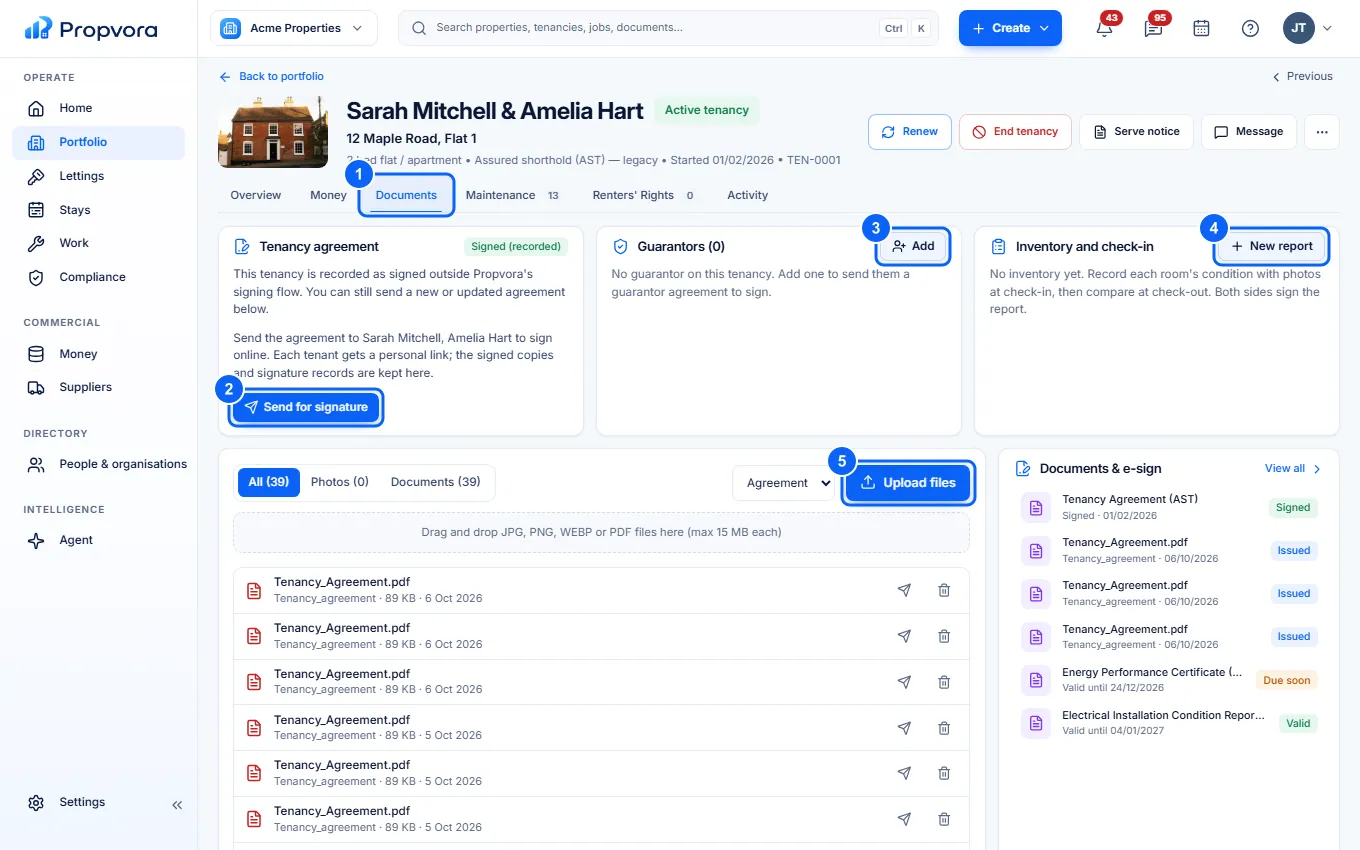 (opens the full-size screenshot)
- Open the tenancy and choose Documents.
- Tenancy agreement: shows whether the agreement is Not sent, Out for signature, Partly signed or Signed by all tenants. Choose Send for signature to send it.
- Guarantors: choose Add to add a guarantor, then send their own agreement for signature.
- Inventory and check-in: choose New report to start a check-in or check-out report.
- Documents & e-sign: every file on the tenancy. Choose Upload files to add more, or send a file securely to someone.
Send the agreement for e-signature
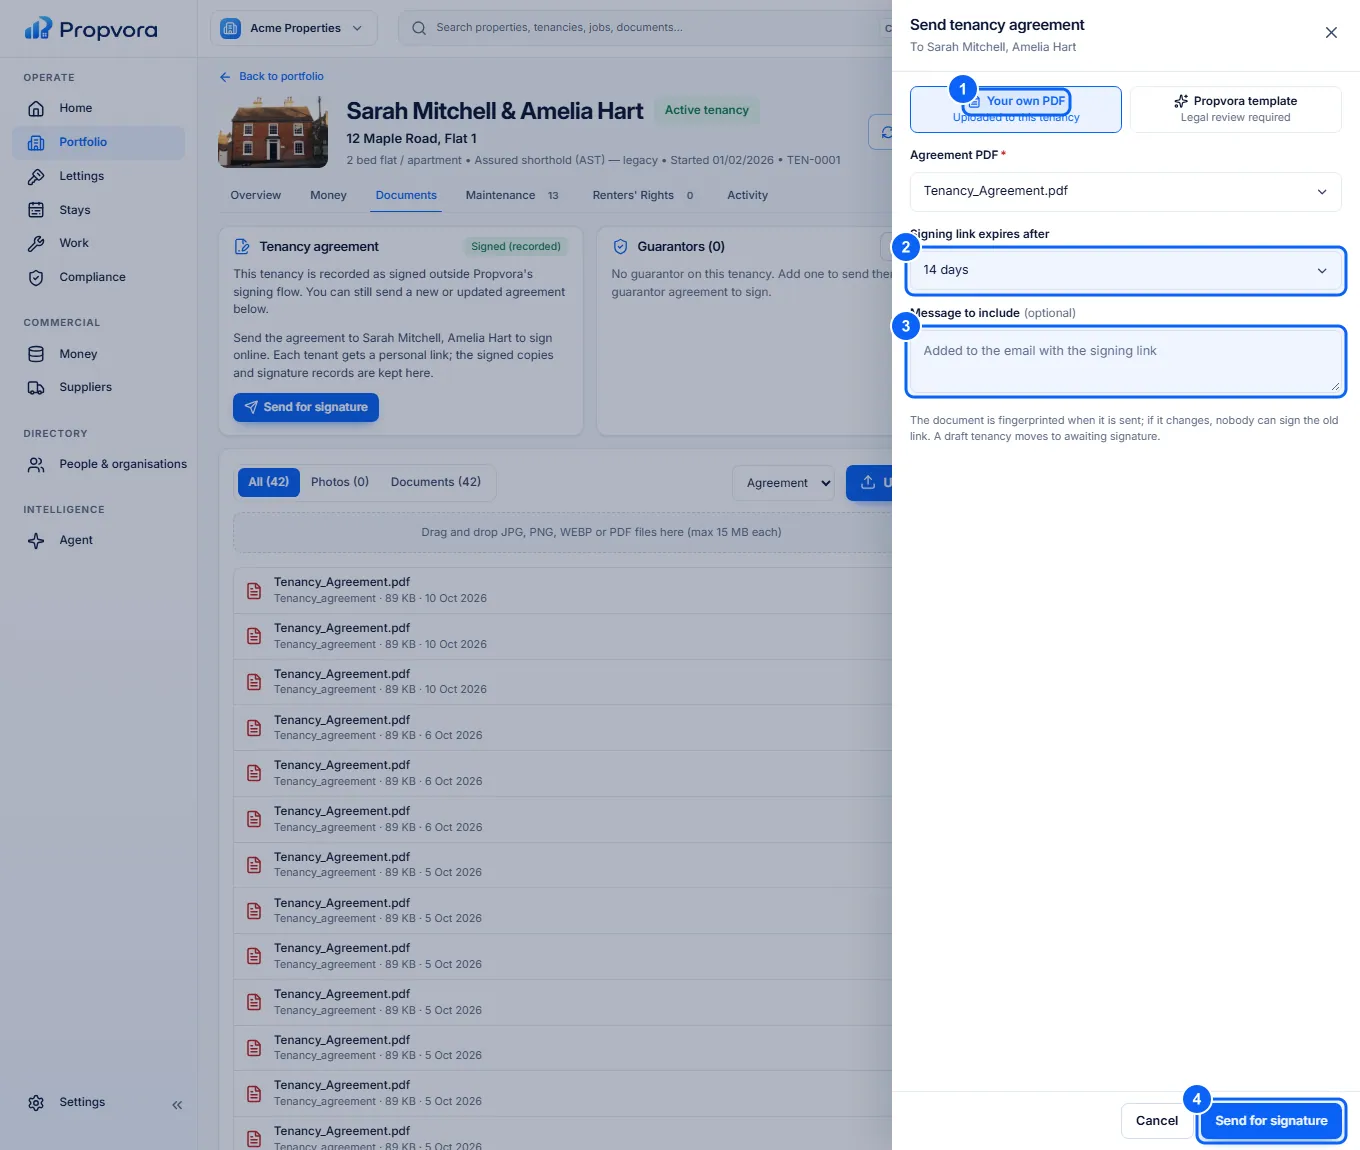 (opens the full-size screenshot)
- Choose Your own PDF (uploaded to the tenancy, recommended) and pick it under Agreement PDF, or a Propvora template. Templates are marked legal review required: have them checked before you rely on them.
- Choose how long the link lasts in Signing link expires after.
- Add a Message to include if you like.
- Choose Send for signature. Each tenant with an email address gets a personal signing link.
The status updates as tenants sign. If something needs to change, choose Withdraw agreement and send a new one. When every tenant has signed, activate the tenancy from More tenancy actions.
Add a guarantor
- In Guarantors, choose Add.
- Choose From Directory to pick an existing person, or New person and enter their First name, Last name and Email.
- Record what the guarantee Covers, then save.
- Choose Send for signature on the guarantor to send their agreement.
Create an inventory report
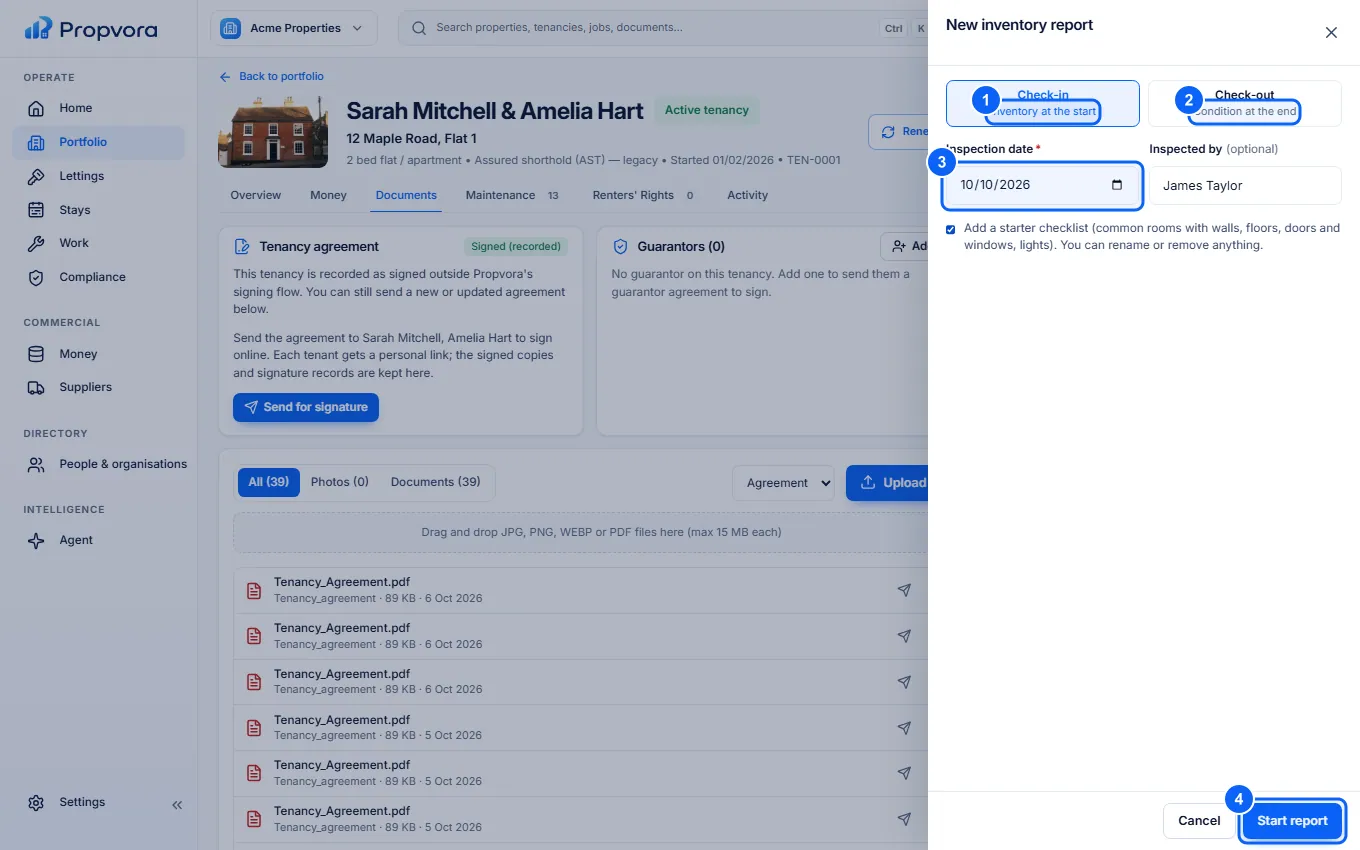 (opens the full-size screenshot)
- Choose Check-in (inventory at the start) or ...
- ... Check-out (condition at the end). A check-out can start from the check-in report so you only record changes.
- Set the Inspection date and Inspected by.
- Choose Start report, then add each room or item with its Condition, Cleanliness and notes, plus Meter readings and Keys handed over.
When the report is complete, choose Sign off and send: you sign for the landlord or agent, and each tenant signs the same PDF through their own e-sign link. Use Printable view or Report PDF for a copy.